bernette 42 FUNLOCK

bernette 42 FUNLOCK
Artikelnr. 5240003124
€ 649,00
Beschikbaarheid online:
  • Dit item is momenteel niet beschikbaar

bernette 42 FUNLOCK
Artikelnr. 5240003124

Productbeschrijving


Omschrijving

Jouw compacte coverlockmachine – sterk op stretch, gemaakt voor opvallende naden.

Functies

  • 4-draads / 3-naalds coversteekmachine
  • Groot werkvlak rechts van de naald ….. 87 mm
  • Helder LED-naailicht
  • Differentieel transport aan de buitenkant, kan tijdens het naaien worden bijgesteld
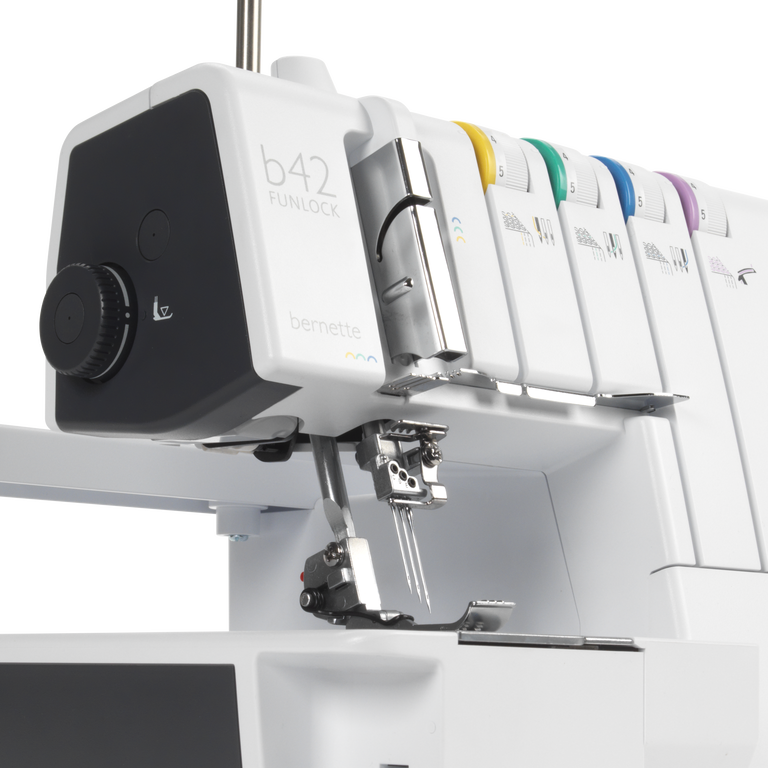
  • Gemakkelijk inrijgen door de kleurgecodeerde inrijgpaden
null

Gemakkelijk inrijgen door de kleurgecodeerde inrijghulpen


Het inrijgen van het garen is heel gemakkelijk dankzij de inrijgpaden in kleur en de ondergrijper-inrijgautomaat. Volg gewoon de gekleurde symbolen en je bernette 42 FUNLOCK is in een handomdraai ingeregen.

null

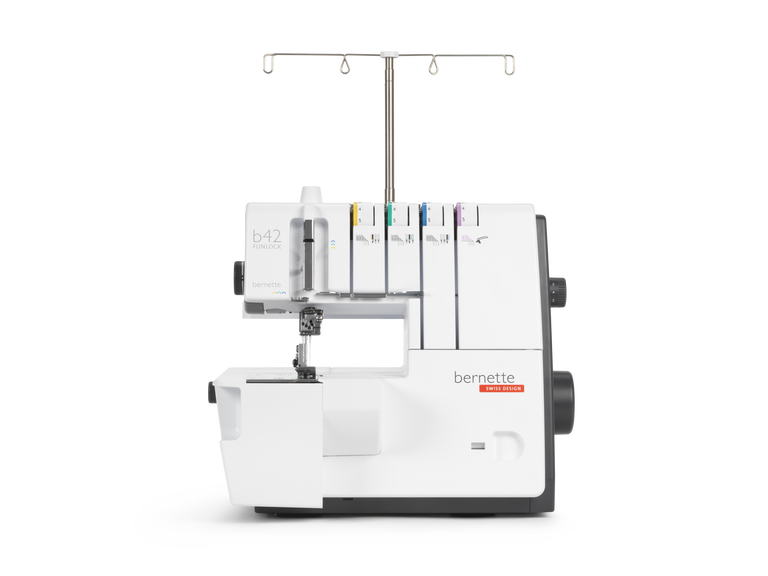
Groot werkvlak voor grote naaiprojecten


Met 87 mm ruimte rechts van de naalden voor de stof om te passeren, geeft de bernette 42 FUNLOCK ook ruim baan aan grotere naaiprojecten. Een ander voordeel is dat het werkvlak goed verlicht wordt door een helder LED-licht.

null

Hoge naaisnelheid voor efficiënt werken


De naaisnelheid van de bernette 42 FUNLOCK kan met behulp van het voetpedaal tot een maximale snelheid van 1300 steken/minuut worden afgesteld, terwijl de machine nog steeds uiterst secuur naait bij elke gekozen snelheid.

null

Handige extra's voor meer naaiplezier


Berg de accessoires die je het meest gebruikt netjes op in het grijperdeksel van je bernette 42 FUNLOCK, zodat je ze altijd bij de hand hebt.


Features and Functions

Elektronisch pedaal
Afmetingen van de machine L / B / H [mm]
336 263 294
Gewicht van de machine [kg]
680 g
Lengte van vrije arm rechts van de naald [inch / mm]
87 mm
Hoogte werkruimte [inch / mm]
60 mm
Spoelhouder [nummer]
4
Hoofdmotor, Type
AC
Type machine
Mechanisch
Maximale naaisnelheid [spm]
1,300 spm
Instelbare bovendraadspanning
manual
Stofborstel
Naaldenassortiment
Net voor bovengarenklossen
Stofkap machine
Accessoirebox

Tutorials

b48 + b44 + b42 Tutorial – Preparation (1/15)
Further information is available at http://www.mybernette.com Do you want to start using your b48, b44 or b42 for the first time? In our video tutorial, we show you the first steps. How do you attach and align the thread stand and the thread guide holder correctly? How do you connect the mains cable and the foot control, and where is the looper cover, as well as the accessories stored inside it? This basic information will help you get to know your overlocker and prepare for your first sewing project!
b48 + b44 + b42 Tutorial – Preparation (1/15)
b48 + b44 + b42 Tutorial – Rethreading (2/15)
Further information is available at http://www.mybernette.com In this video tutorial for your b48, b44 or b42, you will learn important basic information about rethreading, such as: when do you use the spool stabilizers? How can you tie directly onto threads for easy rethreading? How do you separate the thread chain, how do you pull the needle threads through first and then the separate looper threads?
b48 + b44 + b42 Tutorial – Rethreading (2/15)
b48 + b42 Tutorial – Coverstitch/chainstitch (10/15)
b48 + b44 + b42 Tutorial – Changing the needles and needle threader (6/15)
Further information is available at http://www.mybernette.com This video tutorial shows you how to change the needles on your b48, b44 or b42, and how to use the needle threader. When you open the looper cover, you will find a needle holder and an appropriate screwdriver. To change a needle, first loosen the needle screw slightly. When you then wiggle the needle slightly, it will come out. Now insert the new needle into the needle clamp and push it all the way up into the correct position. You can then tighten the needle screw again. The video continues showing the use of the needle threader, which you orient with the notch up. You can then insert the thread horizontally and guide it along the needle groove with little pressure until the thread is guided through the needle eye. Now you can pull the thread through the eye of the needle with ease.
b48 + b44 + b42 Tutorial – Changing the needles and needle threader (6/15)
b48 + b44 + b42 Tutorial – Stitch length and differential feed (7/15)
Further information is available at http://www.mybernette.com In this tutorial video, we show you the various stitch length settings on your b48, b44 or b42. A stitch length of 2.5 to 3 is usually suitable for general sewing. For firm fabrics or thicker threads, you can set a longer stitch length and a shorter stitch length for rolled hems and other purposes. This video also shows you how to adjust the differential feed to the type of material in order to avoid seam puckering, for example. Or do you deliberately want to gather a fine fabric? The video shows you which settings to use for this.
b48 + b44 + b42 Tutorial – Stitch length and differential feed (7/15)
b48 + b42 Tutorial – Coverstitch/chainstitch: basic settings and sewing test (11/15)
Further information is available at http://www.mybernette.com Would you like to carry out your first sewing test using coverstitch or chainstitch on your b48 or b42? Coverstitch is ideal for sewing hems, for example on elastic materials. In this video tutorial, we take you through the process, from the basic settings to sewing for the first time. First, we check the thread tensions, the stitch length setting, the differential feed setting and the presser foot pressure. Then we cut back the looper thread and make sure that the needle threads are not twisted. Now we start sewing, using the markings on the cover as guidelines. The first stitches are secured by the subsequent stitches, it is up to you to secure the last stitches manually.
b48 + b42 Tutorial – Coverstitch/chainstitch: basic settings and sewing test (11/15)
b48 + b42 Tutorial – Stitch optimisation for coverstitch and chainstitch (12/15)
b48 + b44 + b42 Tutorial – Maintenance (15/15)
Further information is available at http://www.mybernette.com It is important to take a little time to regularly clean and maintain your b48, b44 or b42, because during sewing and cutting, fabric, thread and, of course, dust residues build up. In this video tutorial, we show you how to care for your bernette properly. When you open the looper cover, you will find a brush. In the accessory box you will also find a screwdriver and the overlock machine oil. The video shows you exactly how to remove the presser foot and the stitch plate to clean your machine in this area. We then show you which parts you can oil and what to do to make sure the oil is well distributed.
b48 + b44 + b42 Tutorial – Maintenance (15/15)